
Book Appointment Now
How to Build a WordPress Form Fast Using Koala Forms Templates
Building a form field by field is a great way to learn, but it’s a slow way to work. When you need a job application form, a customer survey, or an event RSVP live *today*, starting from a blank page means remembering every field, labeling each one, and arranging them sensibly — all before you’ve collected a single response.
That’s exactly the problem WordPress form templates solve. Koala Forms ships with a library of pre-built forms covering the most common use cases. You pick the one closest to your goal, rename it, tweak a few fields, and publish — often in under a minute. In this guide you’ll learn how to use templates to skip the busywork and get professional forms live fast.
A template isn’t just a head start — it’s a blueprint built by people who’ve made these forms before. Each one comes with:
- The right fields already added and sensibly ordered
- Clear labels and placeholders written for real visitors
- Multi-step structure where a form is long enough to benefit from it
- Sensible defaults so the form works correctly out of the box — just publish and embed it
The result: fewer forgotten fields, a more consistent look, and dramatically less setup time. Templates are especially valuable if you manage several sites or build similar forms repeatedly.
Step 1: Open the template picker
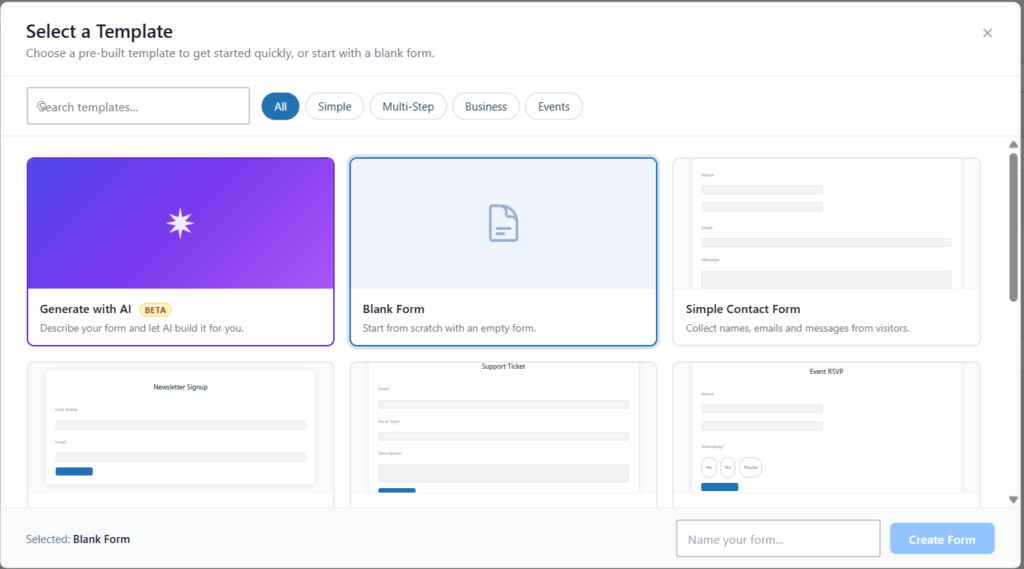
From your WordPress admin, go to Koala Forms → All Forms and click Add New Form at the top of the list. The Select a Template window opens, displaying the full library in a visual grid so you can see each form at a glance.
Step 2: Browse or search the library
Koala Forms includes templates for the situations most websites run into. The current library includes:
- Simple Contact Form — name, email, and message; the classic starting point
- Newsletter Signup — a minimal first-name and email capture to grow your list
- Support Ticket — issue type, priority, and a detailed description
- Event RSVP — attendance, guest count, and dietary notes
- Quote Request — a 2-step form for contact details, then project and budget
- Job Application — a 3-step form for personal info, experience, and cover letter
- Appointment Booking — a 2-step form for details, then date and time
- Customer Satisfaction Survey — ratings first, then open feedback
- Product Enquiry — contact info, then product, quantity, and budget
To find the right one quickly, use the category pills at the top — All, Simple, Multi-Step, Business, and Events — or type into the Search templates… box to filter by name or description.

Step 3: Select a template
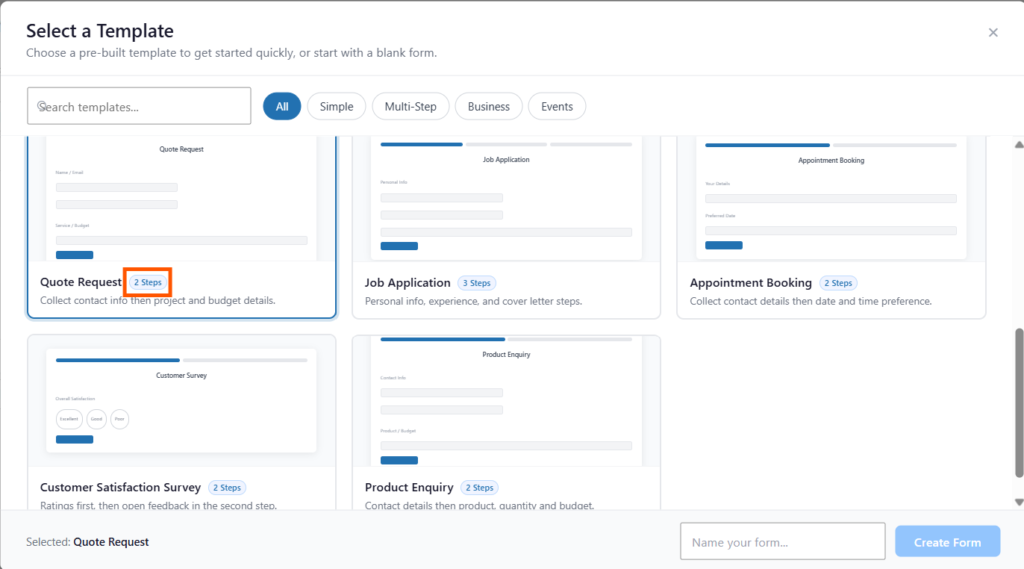
Click the card that best matches your goal. Notice that some cards carry a 2 Steps or 3 Steps badge — those are multi-step forms that split a longer form into friendlier sections to boost completion rates. When you select a card it’s highlighted, and its name appears in the footer next to Selected:.
Don’t overthink the match. Pick the closest template — you can add, remove, and rearrange fields afterward in a few clicks.
Step 4: Name your form and create it
In the footer, type a name into the Name your form… field. Koala Forms pre-fills the template’s name, but you’ll usually want something specific like “2025 Careers – Application” or “Spring Webinar RSVP.” A descriptive name keeps your forms list and submissions organized later.
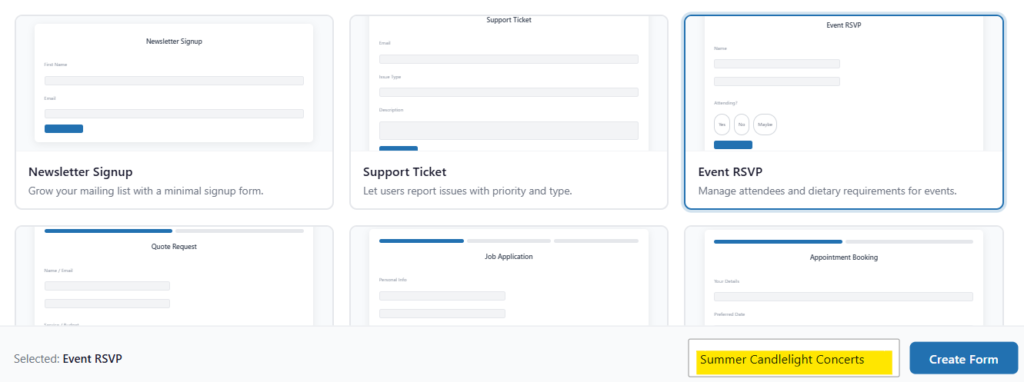
Click Create Form. Koala Forms builds the form and drops you straight into the block editor with every field already in place.
Step 5: Customize the template
Now make it yours. Because every field is a Gutenberg block, editing is quick:
- Rename labels and placeholders — click a field and edit it in the sidebar
- Delete fields you don’t need — remove anything irrelevant to your use case
- Add new fields — open the block inserter and drop in extra fields
- Reorder fields — drag them into the sequence that makes sense
- Adjust options — update dropdown and radio choices to match your business
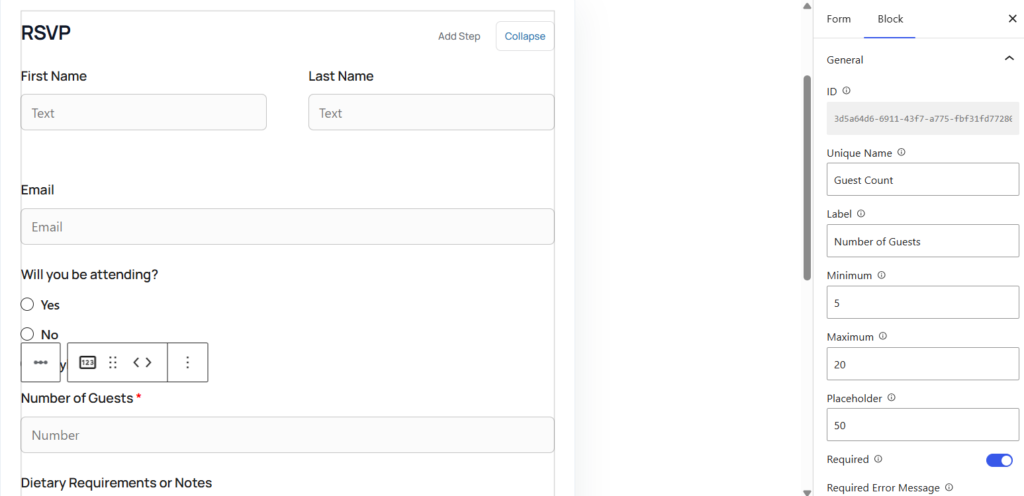
Take an extra minute to set which fields are required, and review the multi-step layout if you chose a stepped template.
Step 6: Publish and embed
When the form looks right, click Save. Koala Forms generates a shortcode like [KoalaForms form_id=”XXX”] that you can paste onto any page or post to make the form live.
Bonus: the “Generate with AI” option
At the top of the template picker you’ll also spot a Generate with AI card. Instead of choosing a fixed template, you can describe the form you want in plain language and let Koala Forms build it. It’s the perfect fallback when none of the templates quite match — we cover it fully in the final guide of this series.
Frequently asked questions
Are Koala Forms templates free?
Yes. All templates in the picker are included with the free plugin — there’s no premium template pack to buy.
Can I edit a template after creating a form from it?
Absolutely. A template is just a starting point. Once your form is created, every field is a normal block you can add, remove, rename, or reorder.
Which template should I use for a contact form?
Start with the Simple Contact Form template. It includes name, email, and message fields — everything a basic contact form needs.
Do templates support multi-step forms?
Yes. Several templates (Quote Request, Job Application, Appointment Booking, and more) are multi-step out of the box. Filter by the Multi-Step category to see them all.
Can I create my own reusable template?
While the picker ships with a fixed library, you can duplicate an existing form or use the AI generator to quickly reproduce a structure you use often.
Key takeaways
- WordPress form templates turn a 20-minute build into a 30-second one.
- Koala Forms includes free templates for contact, newsletter, support, RSVP, quote, job application, survey, and more.
- Filter by Simple, Multi-Step, Business, or Events to find the right one fast.
- Always customize the labels, required fields, and options after creating — a template is a starting point, not the finish line.
Templates get you 90% of the way instantly. As your needs grow, you’ll want to go beyond the defaults and shape forms field by field — which is exactly what we’ll cover next.