
Book Appointment Now
How to Create Your First Form in WordPress with Koala Forms
Every website needs a way for visitors to reach out — a contact form, a signup, a request for a quote. Yet most WordPress form builders bury that simple goal under confusing dashboards, clunky drag-and-drop canvases, and paywalls that block the fields you actually need. If you’ve ever abandoned a plugin halfway through setup, you know the feeling.
Koala Forms takes a different approach. It’s a free, no-code WordPress form builder that works right inside the Gutenberg block editor you already use to write pages and posts. Every field is a block, so building a form feels exactly like editing any other piece of content — no new interface to learn.
In this beginner’s guide, you’ll learn how to create a WordPress form from scratch and publish it in about five minutes. No coding, no theme edits, and nothing to pay for. By the end you’ll have a working contact form ready to collect submissions.
Why choose a block-based form builder?
Before we dive in, it’s worth understanding what makes Koala Forms different — because it changes how the whole process feels:
- No separate builder to learn. Fields are Gutenberg blocks, so you use the same inserter, drag-and-drop, and settings sidebar you already know.
- Truly no-code. You never touch HTML, CSS, or PHP to build or embed a form.
- Submissions stored in WordPress. Every entry is saved to your own database — not a third-party service — and viewable in the admin.
- Free core features. Multi-step forms, email notifications, and an AI form generator are built in.
Now let’s build your first form.
What you’ll need
- A self-hosted WordPress site (version 6.0 or newer recommended) where you can install plugins
- An administrator account
- About five minutes
Step 1: Install and activate Koala Forms
From your WordPress dashboard, go to Plugins → Add New Plugin and type Koala Forms into the search box. Find the plugin in the results, click Install Now, and then click Activate.
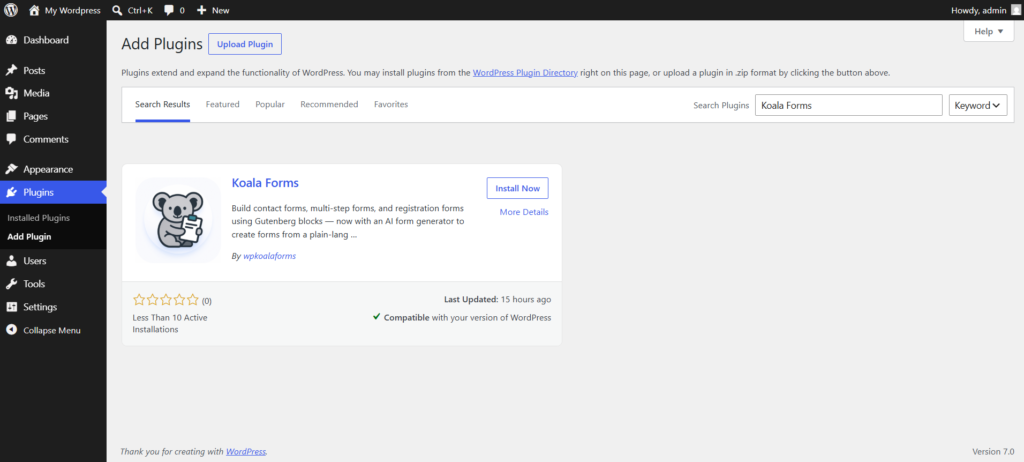
Once activated, a new Koala Forms menu item appears in your WordPress admin sidebar (look for the speech-bubble icon). That menu is home base for everything — building forms, viewing submissions, and adjusting settings.
If you prefer, you can also upload the plugin manually: download the ZIP from the WordPress.org plugin page, then go to Plugins → Add New Plugin → Upload Plugin, choose the file, and activate.
Step 2: Open the Koala Forms dashboard
Click Koala Forms in the sidebar. You’ll land on the dashboard — a clean overview that shows how many forms you have, how many are actively collecting entries, and your most recent submissions. On a fresh install it will nudge you to create your first form.
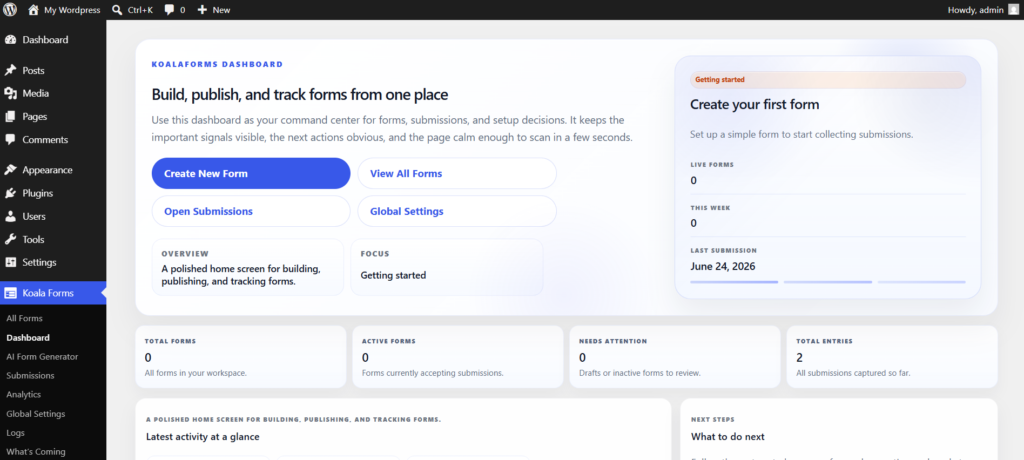
To begin, click Create New Form. (You can also open All Forms from the submenu and use the Add New Form button at the top of the list — both routes open the same template picker.)
Step 3: Choose a starting point
A template picker opens, offering a library of ready-made forms alongside a blank option. You can filter templates by category — Simple, Multi-Step, Business, and Events — or search by name. Options include a Simple Contact Form, Newsletter Signup, Event RSVP, Job Application, and more.
For your very first form, select Blank Form. Starting blank helps you understand how each piece fits together before you lean on templates later.
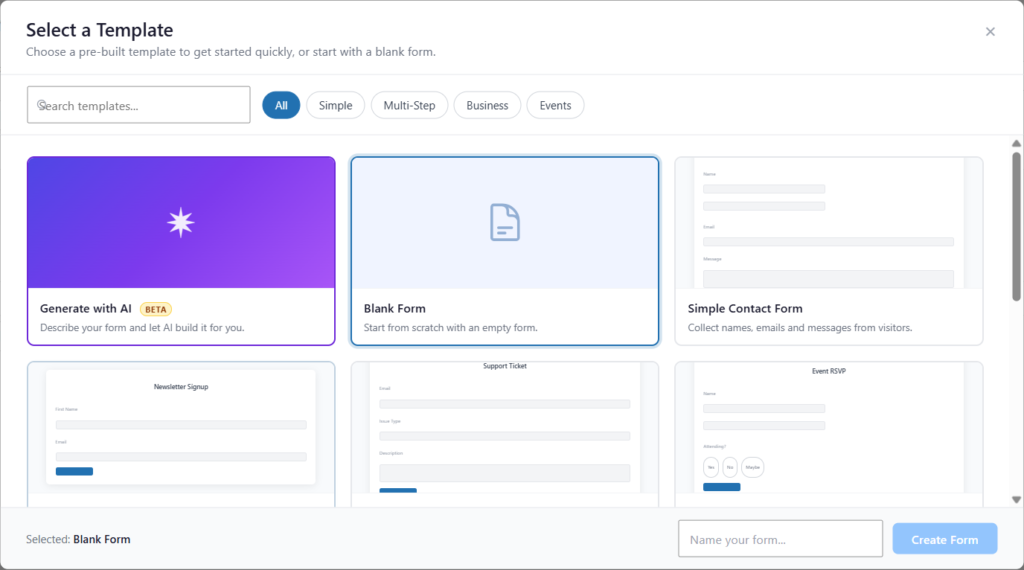
Give your form a descriptive name in the Name your form… field — something like “Contact Us” — then click Create Form. A clear name matters later when you’re juggling several forms and reviewing submissions.
Step 4: Add your first fields
Your new form opens in the familiar WordPress block editor. This is where the block-based approach shines: every field is a block you insert.
Click the + (block inserter) in the top-left corner (or the inline + that appears between blocks), search for a field, and click to add it. For a basic contact form, add:
- A Text field for the visitor’s name
- An Email field for their address
- A Textarea (Paragraph) field for their message
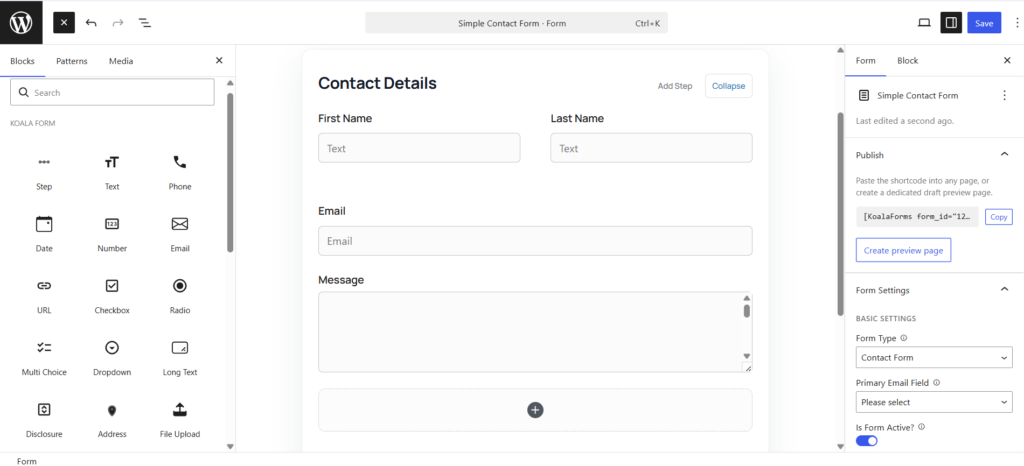
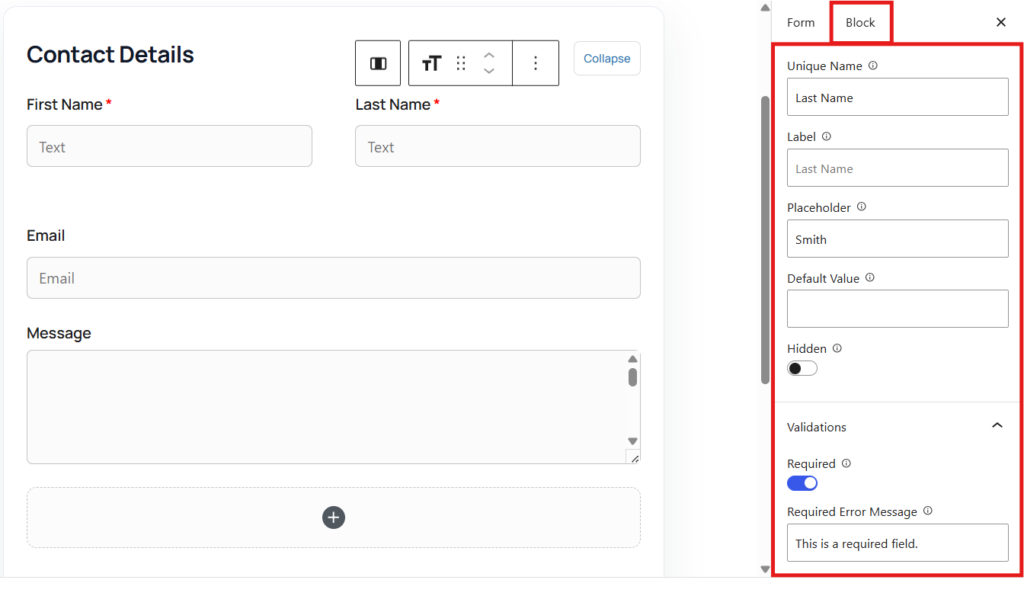
Each field drops straight onto the form. Click any field to open its settings in the sidebar on the right, where you can rename its label (for example, change “Text” to “Your Name”), add a placeholder, and mark it as required.
Step 5: Configure the essentials
You don’t need to touch every setting yet, but two quick tweaks make a big difference:
- Set clear labels. Click each field and give it a plain-language label your visitors will understand.
- Mark required fields. In the field’s General settings, toggle Required on for anything mandatory — usually the name and email.
Step 6: Publish your form and copy the shortcode
When your fields look right, click **Publish** in the top-right corner — exactly as you would for a page or post. Confirm the publish, and Koala Forms saves your form and generates a shortcode that looks like this:
[KoalaForms form_id="123"]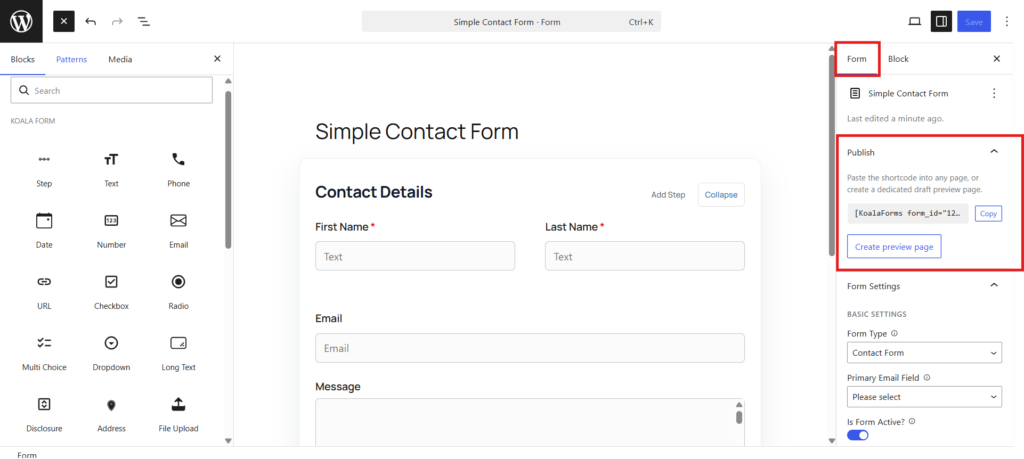
Here’s the important part: publishing doesn’t put the form on your site by itself. It makes the form available and hands you a shortcode. Your form only becomes visible to visitors once you paste that shortcode where you want it to appear — on a page, in a post, or in a widget area like a sidebar or footer. Copy the shortcode now (Form panel has a one-click copy button) placing it on a page is covered step by step in [How to Embed a Koala Form on Any WordPress Page or Post](05-embed-a-form-on-a-page.md).
Step 7: Send a test submission
Never assume a new form works — prove it. Once you’ve placed the form on a page (see the embedding guide), open it as a visitor, fill it in, and submit. Then head to Koala Forms → Submissions to confirm the entry was captured. Testing now saves you from discovering a broken form after you’ve lost real enquiries.
Frequently asked questions
Do I need to know how to code to create a WordPress form?
No. Koala Forms is fully no-code. You build forms with the Gutenberg block editor and embed them with a shortcode — no HTML, CSS, or PHP required.
Is Koala Forms free?
Yes, the core plugin is free and includes field blocks, multi-step forms, email notifications, submission storage, and more.
Where are my form submissions stored?
Every submission is saved securely in your own WordPress database and is viewable under Koala Forms → Submissions. Your data isn’t sent to a third-party service.
How many forms can I create?
There’s no limit. Create as many forms as your site needs, each with its own fields, settings, and shortcode.
Will Koala Forms work with my theme?
Yes. Forms use minimal, standard markup that works with virtually any modern WordPress theme, and you can style them further with CSS if you like.
Key takeaways
- Koala Forms is a free, no-code WordPress form builder built on the Gutenberg block editor.
- You can create a WordPress form in about five minutes: install the plugin, click Create New Form, add field blocks, publish, then embed it on a page with the shortcode.
- Publishing a form generates its shortcode — the form goes live only once you paste that shortcode onto a page, post, or widget.
- Every field is a block, so building forms uses skills you already have.
- Submissions are stored safely in your WordPress database.
You’ve just installed Koala Forms and built your first working form without touching a line of code. The fastest way to build your next form isn’t from scratch, though — it’s with a ready-made template.